
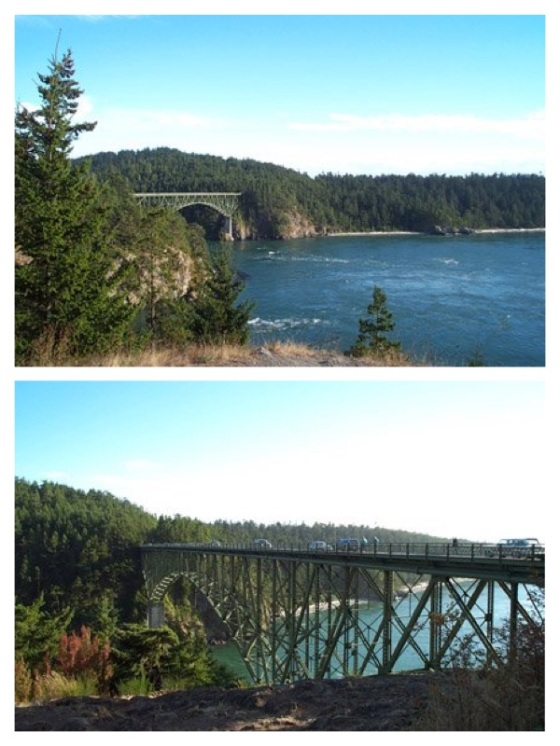
A bridge is a structure built to span a gap or obstacle without closing the opening underneath. For example, a bridge may provide passage over a river, a valley or a road. The design of a bridge varies depending on its function, the terrain of its location, and the construction method and building materials used to make it.
Using a simple sheet of card stock and a few building blocks, we explored how a bridge structure supports weight. By keeping the same span and terrain (our kitchen table), and using card stock for our building material in all three tests, we were able to focus on how changing just the construction method can allow a bridge to hold greater loads. This is also a great activity to introduce the concept of a hypothesis, or predicting what will happen in each of the tests.
Paper Bridges & Hidden Triangles
Supplies:
- Card stock (we used one sheet of yellow card stock for our “flat bridge” and one sheet of blue card stock for our “folded bridge” for clarity in looking at the different building methods. This is particularly helpful as we bring everything together in the final part of the activity.)
- Building blocks
- Scissors
- Hot glue gun
Instructions:
Part 1 – Flat vs. Folded:
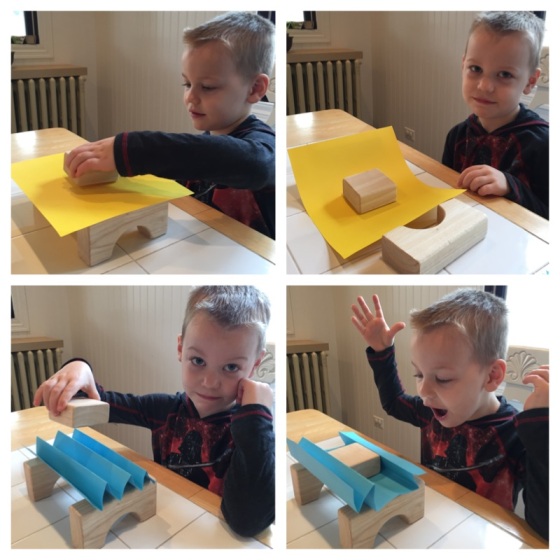
Flat Bridge Test:
- On a flat surface, place two building blocks (or thick books) 6-8″ apart.
- Use a flat sheet of card stock to form a bridge between the building blocks, as shown with the yellow bridge below. Make sure that an equal amount of the paper rests on each building block.
- Ask your little engineer to hypothesize, or predict, what will happen when a block is placed in the center of the sheet of card stock.
- Test the strength of the flat card stock bridge using a small building block or another light-weight object. Place the block in the middle of the bridge. (As you can tell by my son’s face below, his prediction was correct, and he was unimpressed with the experiment so far.)
Folded Bridge Test:
- As before, place the two building blocks 6-8″ apart.
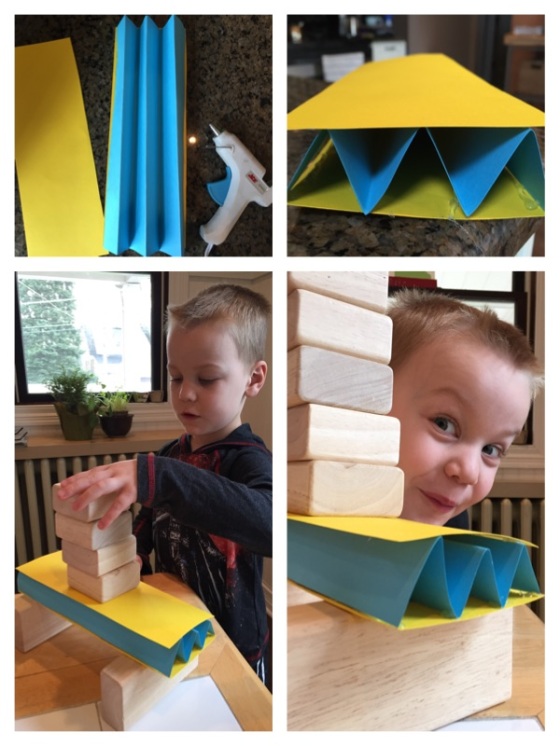
- Fold a sheet of card stock accordion style, keeping folds even along the full width or length of the sheet, as shown with the blue bridge below.
- Use the folded card stock to form a bridge between the building blocks (or books). Make sure that an equal amount of the paper rests on each building block.
- Ask your little engineer to hypothesize, or predict, what will happen when a block is placed in the center this card stock bridge.
- Test the strength of the folded card stock bridge using a small building block or another light-weight object. Place the block in the middle of the bridge. (As you can tell by my son’s reaction below, his prediction of the bridge immediately collapsing again was incorrect, and he was suddenly very interested in this building technique and why it worked!)
Why is the folded bridge stronger?
The weight of the block sitting on the bridge is spread out rather than concentrated at the center, as it was with the flat bridge. Each of the peaks in the folded bridge “frame” spreads the weight evenly to the block “supports” and down to the table “foundation.” The more peaks we create, the less weight there is on any single part of the bridge. When designing bridges (or floors or roofs), structural engineers design the structure to spread the weight, or load, of vehicles (or people, furniture, etc.) down to the foundation. Can Therefore, the folded bridge can support more weight, than the flat bridge.
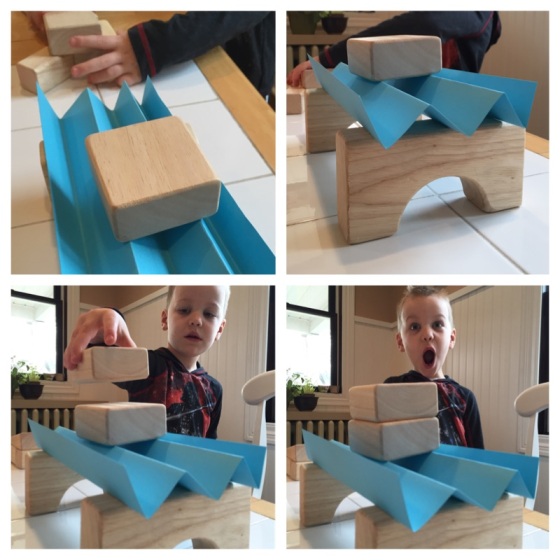
Part 2 – Testing the Limits:
We know the folded bridge is stronger than the flat bridge and we know why it is stronger, but how much can it hold?
Folded Bridge Load Test:
- As before, place the two building blocks (or thick books) 6-8″ apart.
- Use the folded card stock to form a bridge between the building blocks. Make sure that an equal amount of the paper rests on each building block.
- Test the strength of the folded card stock bridge using a small building block or another light-weight object. Place the block gently in the middle of the bridge. (In the first test, as you can see in the Part 1 photos, we were not so gentle in placing the block on the bridge – but it still held!)
- Time to hypothesize! Ask your engineer how many blocks he or she thinks thinks the bridge can hold and how the bridge will collapse or “fail” when the “load” becomes to great.
- Carefully add another block to the bridge, balancing it on top of the original block.
- Continue to add blocks one at a time, increasing the “load” on the bridge.
Can you see the hidden triangles in the bridge?
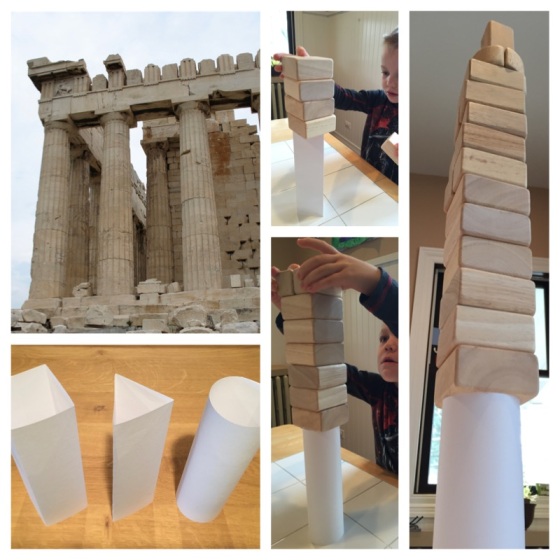
Engineers must consider two types of forces in bridge design: compression (pushing) and tension (stretching). Triangles are the strongest shape because they have fixed angles so they do not distort or shift easily. To design and build a stable bridge or a tall building that resists compressive and tensile forces, the right geometry is required. This typically means that triangles can be found throughout a bridge or building’s structural design, as seen in the sample framing, bridge and skyscraper images above. These triangles are formed using braced rectangles and trusses.
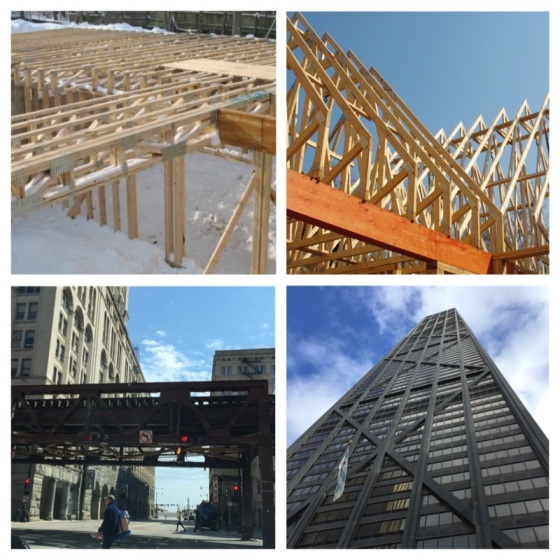
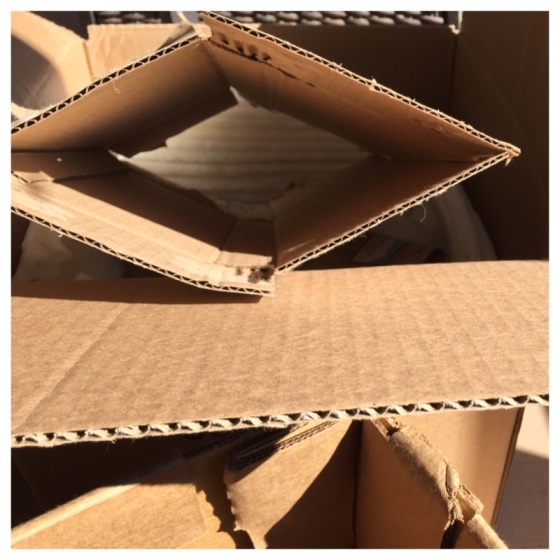
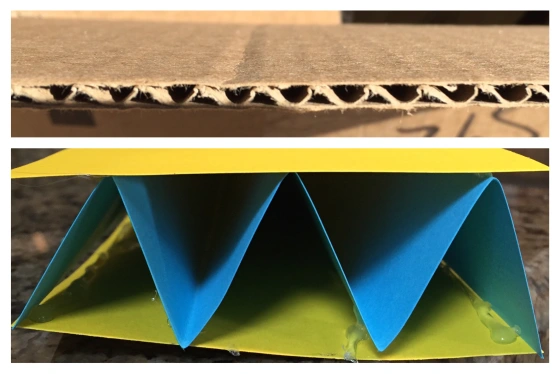
Just like our bridge, hidden triangles are used to make other objects stronger,too. Look at the edge of a thick cardboard box. Between the two flat sheets of paper, you can clearly see the tiny triangles of the folded, or corrugated, sheet in the middle.
Part 3 – Bracing for Shear Force:
Before our folded bridge collapsed, the “hidden triangles” begin to shift and fall. This is because they were not braced, or complete three-sided triangles. What happens if we design a bridge that keeps the “hidden triangles” in place?
Building the Reinforced Bridge:
- While the glue gun heats up, cut the flat (yellow) sheet of card stock in half.
- Place one half flat on your work surface and align the folded sheet of card stock (blue) on top of the flat sheet so that it fits within both the length and width of the sheet (as shown below).
- Carefully, glue the ends and peaks of the triangles to the flat sheet.
- Repeat aligning and glueing on the top flat (yellow) sheet.
- Adjust as required and secure any loose edges at the ends with additional hot glue.
Testing the Reinforced Bridge:
- As before, place the two building blocks (or thick books) 6-8″ apart.
- Use the reinforced folded bridge to span the two building blocks. Make sure that an equal amount of the bridge rests on each building block.
- Test the strength of the bridge using a small building block or another light-weight object. Place the block gently in the middle of the bridge.
- Time to hypothesize! Ask your little engineer how many blocks he or she thinks thinks this bridge can hold.
- Carefully add another block to the bridge, balancing it on top of the original block.
- Continue to add blocks one at a time, increasing the “load” on the bridge.
Shearing forces are unaligned forces pushing one part of an object in one direction, and another part the object in the opposite direction. By adding the support of the the flat sheets secured in place with glue, the triangles can no longer easily shift and twist under the weight of the blocks. The reinforced bridge can hold a much larger load!
This bridge is strong enough to also use a toy car ramp or bridge for more creative engineering play!
Want to continue building new structures and testing their load bearing capacity? Try building these Paper Columns and see just how high you can stack those blocks! (Sneak peak images below!)
Looking for even more architecture and engineering projects for young designers like the projects shown below?
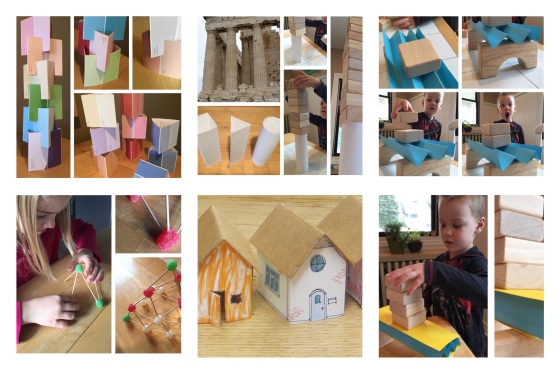
For more entertaining and engaging building activities that test the strength of geometric shapes (preview images above), check out the following posts:
- Paint Chip Building Blocks (top left)
- Paper Columns (top center)
- Paper Bridges (right top + bottom – this post!)
- Gumdrop Engineering (bottom left)
Looking for more than just a bridge and hoping to build your own tiny houses (like those shown above (bottom center)? See Introduction to Architectural Model Making.
For a fun hands-on group activity with children of all ages, grab some friends and act out multiple structures while really feeling forces in action with Architecture Body Building!
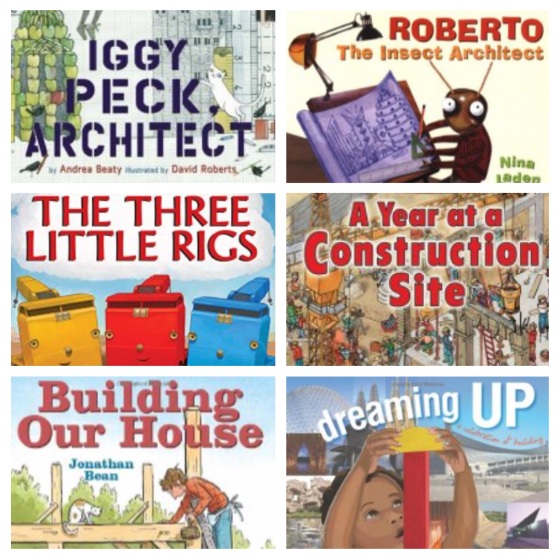
And, you can’t go wrong with these great Architecture and Construction Storybooks.
Happy Building!

Pingback: Paper Columns | Design in Play
Pingback: Paint Chip Building Blocks | Design in Play
Pingback: Architecture “Body Building” | Design in Play
Pingback: Gumdrop Engineering | Design in Play
Pingback: Introduction to Architectural Model Making: Plans + Elevations = 3D Model | Design in Play