
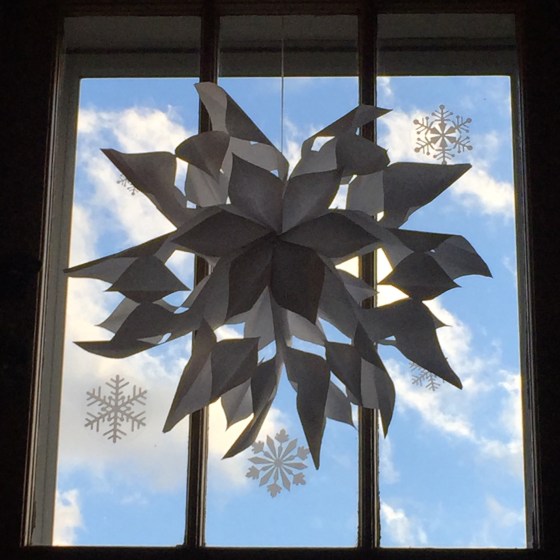
Try this 3D twist on the classic cut-out snowflake!
Supplies you’ll need:
- 6-8 white standard lunch bags (We used 6 here to tie into our study of 6-pointed snow crystals, but 8 or more bags will have a fuller appearance.)
- Card stock or thin cardboard (to use as template)
- Scissors
- Double-sided tape or glue stick
- Hole punch
- White ribbon or twine
- Optional: edger scissors

Instructions to “Build a Snowflake”:
- Cut bottom off of each lunch bag.
- Trace the bag outline onto card stock. This will be the template for the snowflake details.
- Fold the template lengthwise and off top corner to create a symmetrical point at the center as shown above. Along sides use standard or edger scissors to cut decorative edge details. Using hole punch, punch a hole in the center of the bottom of the template.
- Place the template over a lunch bag, aligning top and sides. Cut along template point and decorative edge. Be sure to keep at least 1/3 to 1/2 of the edge of the bags intact at the base. Use hole punch to punch out hole aligned with template.
- Repeat step above for remaining bags.
- Place strips of double sided tape on top face of one lunch bag as shown above. Carefully align second lunch bag and press into place.
- Repeat taping and aligning to connect all six bags.
- Thread ribbon through the stacked holes at the base of the bags and tie a loose loop, leaving at least 2 feet of ribbon to hang final snowflake.
- Place strips of double sided tape on top bag. Place the ribbon so that it passes between the tape strips as shown above.
- Gently pull the top of bags apart and carefully extend into a full circle so that the back face of the bottom bag aligns and adheres to the top face of the top bag. Press firmly together.
- Hang up your beautiful 3D snowflake!
Looking for more snow and snowflake-inspired activities that include more complex math and science topics? The images below display snow-themed activities incorporating elementary through middle school STEAM concepts. Links to posts below!
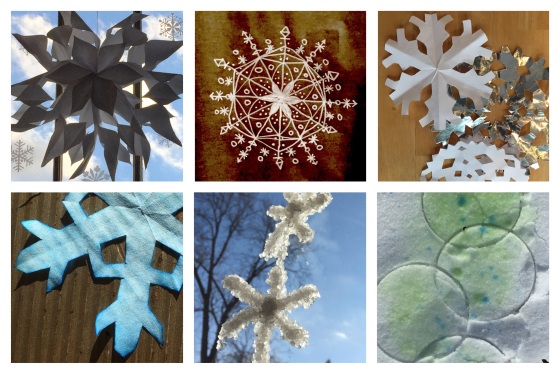
For more winter-themed art activities above that include math, science and engineering concepts go to the following links:
- Do You Want To Build a Snowflake (top left – this post!)
- Snow Crystal Geometry (top center, top right + bottom left)
- Growing Snow Crystals (bottom center)
- A Blank Canvas of Snow (bottom right)
Interested in snowman-themed projects for artists of all ages? The snowman images below are shown in order of complexity starting with toddler/preschool activities and progressing through elementary/middle school STEAM concepts. Links to posts below!
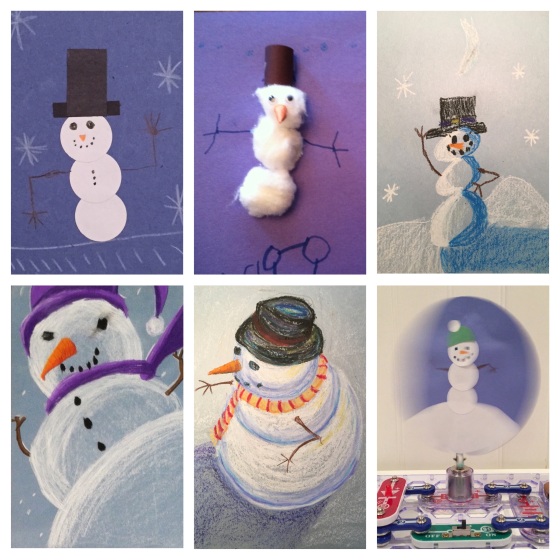
To further explore art, math and science concepts through snowman-inspired activities, go to the following links:
- Stacking Snowman Shapes (top + center left)
- Simple Snowmen (top right)
- Snowmen Perspectives (bottom left + center)
- Thaumatrope Snow Globes (bottom right)

Pingback: Snow Crystal Geometry | Design in Play
Pingback: A Blank Canvas of Snow | Design in Play
Pingback: Do You Want to Draw a (Perspective) Snowman? | Design in Play
Pingback: Simple Snowmen (with Shading & Highlights!) | Design in Play
Pingback: Thaumatrope Snow Globes | Design in Play
Pingback: Growing Snow Crystals | Design in Play
Pingback: Montessori-Inspired & Holiday-Themed Learning Trays | Design in Play