
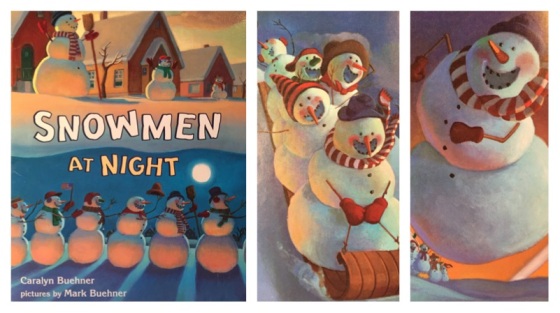
Snowmen at Night is one of my kids’ favorite wintertime books. It’s become a bit of a tradition to pull it out in January, just like reading seasonal and holiday-themed books other times of the year. The story is entertaining and the illustrations are simply beautiful. Each page is full of happy snowmen frolicking around and viewed from many angles in the changing light. This provided a beautiful introduction to perspective drawing!
After reading the story and examining our favorite drawings, we were ready to start drawing and building our perspective snowmen.
Note, this activity is best for early elementary and up. For and easy introduction to these concepts, or a fun art project with even younger (preschool) artists interested in exploring highlights, shading and perspective with snowmen check out Simple Snowmen.
Supplies:
- Light blue construction paper
- Oil Pastels (make sure you have white in the set!)
- Colored Pencils
Instructions: Looking Up!
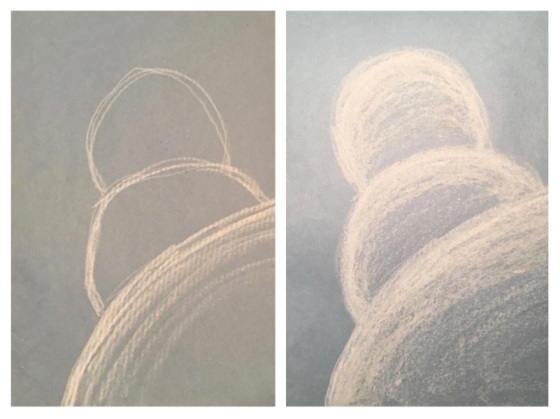
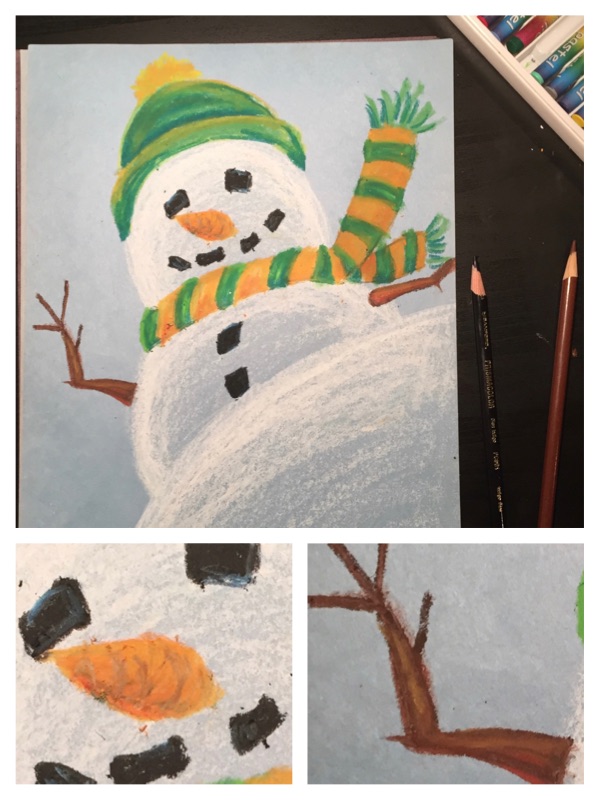
First, rough in the snowman. Using a white oil pastel, start to sketch in the rough shape of your snowman by creating a arc, or 1/4 of a circle, across the bottom corner of the page. Next, draw 1/2 of a circle on top of the arc, and then 3/4 of a circle stacked on top of the half, moving diagonally across the page to the opposite top corner (as shown below).
After the three partial circles are roughed in, begin creating the snowman highlights by coloring the top portion of each shape. The outline and top should be bright white, with fewer and fewer strokes as you get to the lower half of each shape. Do not color the “bottom” of each circle so the color of the paper becomes the shaded portion of each “snowball.”
Once the three “snowballs” of the snowman are highlighted and shaded as shown above, it’s time to give him some personality. We used two colors to build a scarf around his neck. Then, added a cap to the top of his head. Be sure to add a hat behind the top of the top “snow ball” to keep the appearance of “looking up” under the brim of the hat. This will add depth to your perspective snowman.
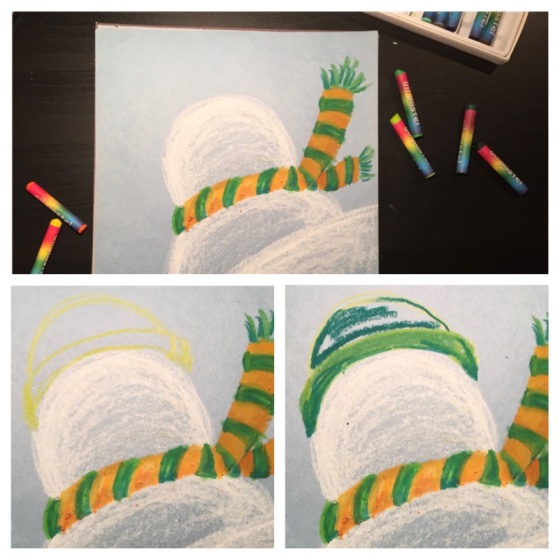
Continue to develop details in the clothing by layering in colors for highlights and shading. (We added a bit of dark orange to the lower portions of our gold stripes and dark green to the lower portion of our green stripes, with yellow at the top of both.) Use a black oil pastel to add the typical snowman features – eyes, mouth, buttons – or add your own personalized touches. To add a carrot nose, start with an orange circle positioned at the center of the face as shown below. Extend out to the side with a triangle shape. Color in orange, with darker color shading below. (We used a bit of brown and blue.)
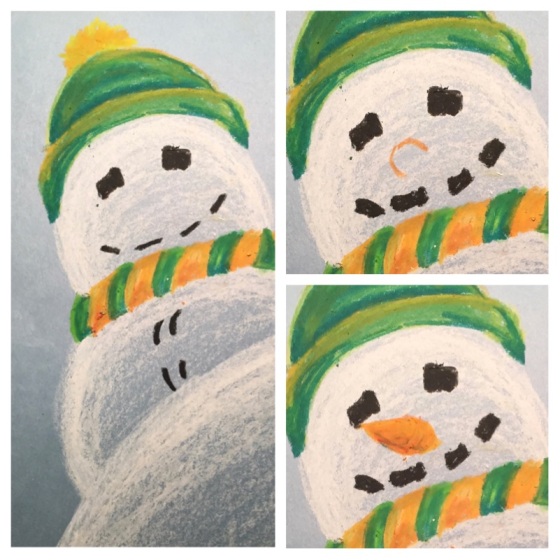
Use a brown oil pastel to add twig arms as shown below starting at the sides of the center “snowball” and angling out and away from the “body.” Start light and build up with two shades of brown or add in other colors. Finally, use colored pencils for any fine details you’d like to add. (We touched up the edges of the twigs in black and brown, especially at the fingers, and cleaned up the outlines of the coal pieces using a dark blue.)
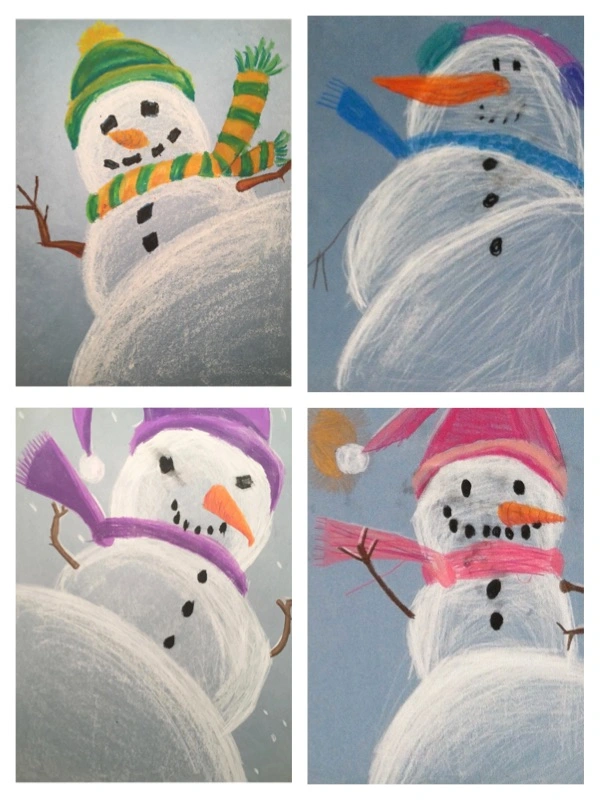
Once you’ve built one (perspective) snowman, try a few more!
Instructions: Looking Down!
After mastering the snowman perspective from below, it may be fun to add a few steps in highlights and shading while creating a snowman viewed from above.
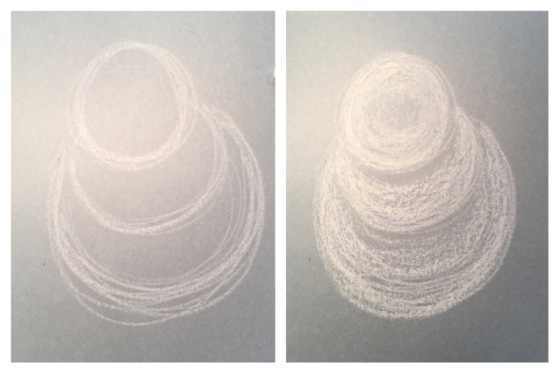
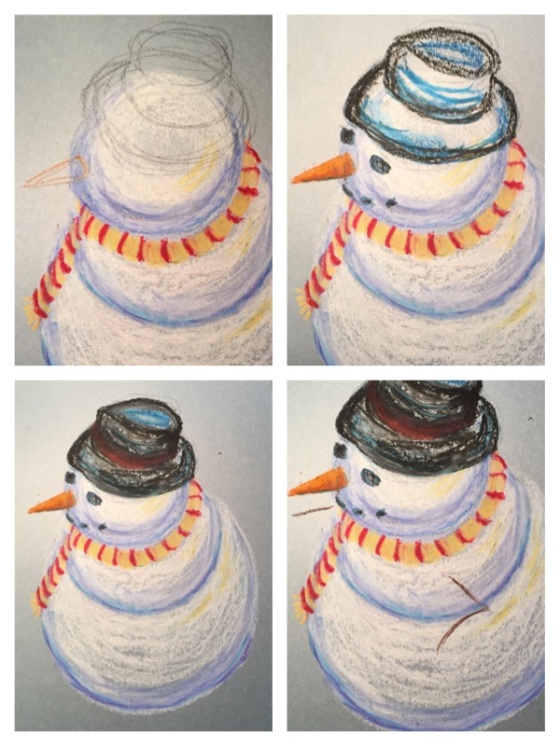
Just as before, begin by roughing in the snowman shape. Using a white oil pastel, start to sketch in the rough shape of your snowman by creating a small circle toward the top third of the page. Next, draw a slightly larger circle, wrapping along the underside of the first circle. Finally draw the larges circe wrapping around the underside and sides of the middle circle (as shown below).
After the three partial circles are roughed in, begin creating the snowman highlights by coloring each shape in a circular motion following the outer curve of each circle.
To work more with shading and highlights, rather than just relying on the paper as in the Looking Up Perspective, use a dark blue oil pastel, to shade in the bottom and sides of each circle as shown below. Do not fret over blending yet, just color evenly.
To add a scarf, draw tiny curved lines around the base of the top circle, then trailed along the side to the edge of the bottom circle. Next, color between each curved line. We chose alternating red and yellow. For brighter highlights and darker shading, add pale yellow highlights at the top edge of each circle on the same side and add a thin line of even darker blue at the base of each circle (as shown below).
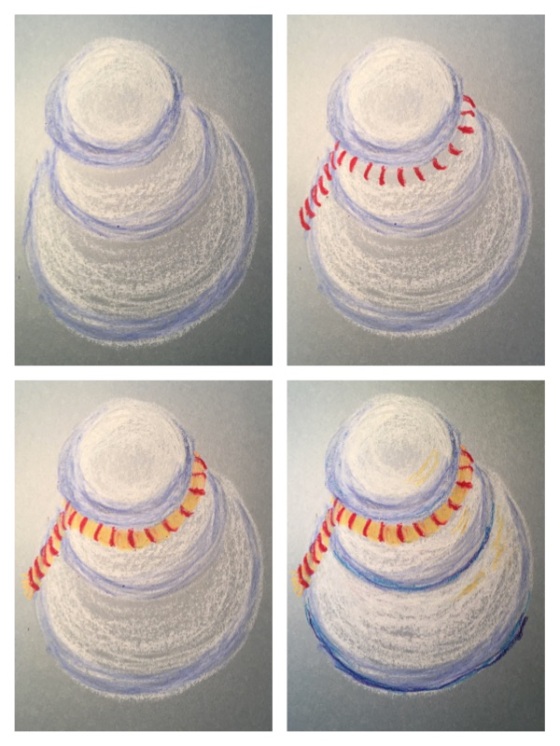
We chose to add a top hat to this snowman. Unlike our Looking Up Perspective’s hat, this time the hat must cover a portion of the top circle to keep the Looking Down illusion. Start by roughing in your hat shape lightly, then build in the colors you chose. Add other features like the carrot nose, buttons, coal eyes, etc., the same way, by lightly sketching in outlines then building up color.
Using a white oil pastel, blend the highlights and shading by coloring over the blue shading and yellow highlights, using the same curved/circular coloring motion. Colors should blend and smear together.
Using a brown oil pastel, add the twig arms as before, starting at the center of the center “snowball” and branching out. No pun intended.
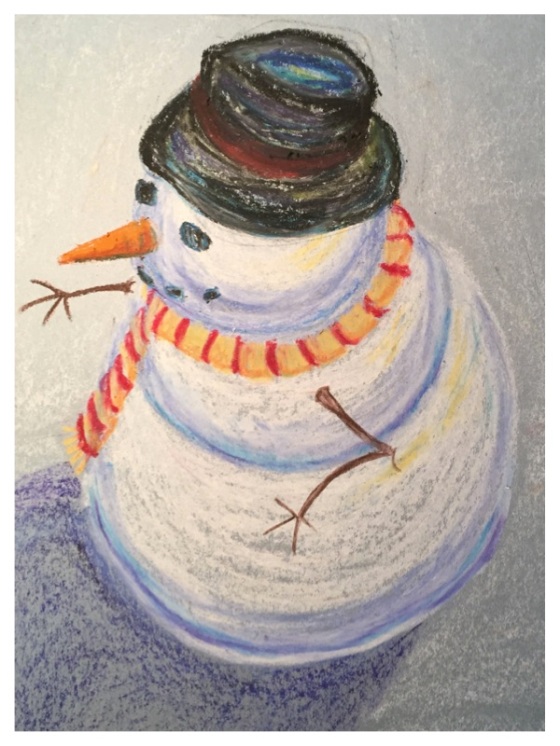
Finally, add the ground below. Lightly outline a “shadow” for the snowman from the bottom circle to the side and bottom of the page. Be sure the shadow is placed on the opposite side of the snowman than his (yellow and white) highlights. Fill in the shadow using the side of the blue pastel. Using the side of a white oil pastel lightly shade in the remaining paper to create the snowy ground.
Looking for more fun snow-themed activities? The snowman images below are shown in order of complexity starting with toddler/preschool activities and progressing through elementary/middle school STEAM concepts. Links to posts below!
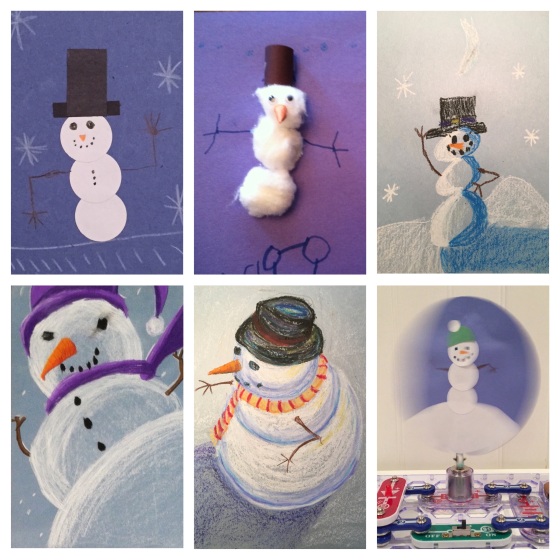
To further explore art, math and science concepts through snowman-inspired activities, go to the following links:
- Stacking Snowman Shapes (top + center left)
- Simple Snowmen (top right)
- Snowmen Perspectives (bottom left + center – this post!)
- Thaumatrope Snow Globes (bottom right)
Looking for more snow and winter-themed activities that include more complex math and science topics? The images below display snow-themed activities incorporating elementary through middle school STEAM concepts. Links to posts below!
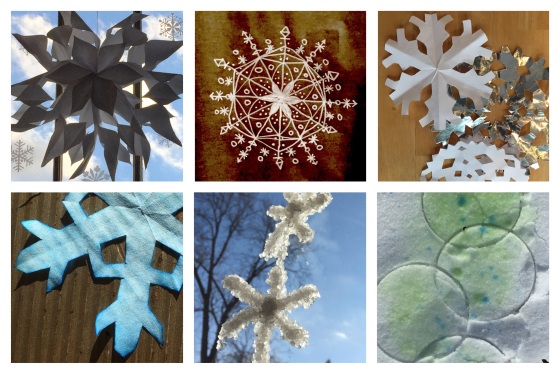
For more winter-themed art activities above that include math, science and engineering concepts go to the following links:
- Do You Want To Build a Snowflake (top left)
- Snow Crystal Geometry (top center, top right + bottom left)
- Growing Snow Crystals (bottom center)
- A Blank Canvas of Snow (bottom right)

Pingback: Simple Snowmen (with Shading & Highlights!) | Design in Play
Pingback: Do You Want to Build a Snowflake? | Design in Play
Pingback: Thaumatrope Snow Globes | Design in Play
Pingback: Growing Snow Crystals | Design in Play
Pingback: Montessori-Inspired & Holiday-Themed Learning Trays | Design in Play
Pingback: Snow Crystal Geometry | Design in Play
Pingback: A Blank Canvas of Snow | Design in Play
Pingback: Beyond Coloring | Design in Play
Reblogged this on Design in Play.
Pingback: 13 Snowmen at Night Crafts and Art Projects for Kids
Pingback: How To Draw A Snow Man - Autocad Space