

Have you grown crystals to make a snowflake (or rather a snow crystal!) this winter? This winter-themed, kid-friendly project utilizes fine motor skills, creativity, science observation, and mathematical skills, including addition, multiplication, estimating and measuring.
To get started, first you and your little scientists may want to learn a bit about the basic science and math behind real snow crystal formation by visiting my recent post, Snow Crystal Geometry. Then, gather the supplies listed below to grow your own snow crystals!
 Supplies:
- Pipe cleaners (white, blue, and/or metallic)
- Thin string
- Water
- Borax
- Large vase or jar
- Scissors
- Measuring spoons
- Chopstick, pencil, or other utensil (that will rest flat across the top of vase)
- Optional: Reference book for inspiration (and other snow-themed learning opportunities) such as The Secret Life of a Snowflake.

Instructions:
- Using snowflake images as a reference, examine the basic features of the typical snow crystal: six branches, fairly symmetrical, etc.
- Bring a full pot of water to boil. Specific amount will vary depending on how many snowflakes you make.
- While water comes to a boil, cut a pipe cleaner into 3 equal segments.
- Twist segments together at the center, essentially creating a six pointed asterisk.
- Next, get creative. Keeping all six branches the same, use smaller segments of pipe cleaner to add details and additional smaller branches. Or, stay simple and link small “asterisk” snowflakes together along the same string as shown above.
- To attach a string to the snowflake, tie the string to one of the top branches of the snowflake, looping end of the pipe cleaner over the knot to secure it. If making a chain of snowflakes, tie the top and bottom snowflake as noted, but link the middle snowflake(s) by securing the string in the center of the snowflake with a knot then twist the pipe cleaners over it to secure. (Note: Before making a “chain” of snowflakes make sure you have a vase tall enough to submerge the entire snowflake chain without it touching the bottom of the vase!)
- Once you’ve created your pipe cleaner snowflake(s) verify that it fits in a jar or vase with a bit of space around the top, bottom and sides so that it does not touch the glass. Using a chopstick, pencil or other stable utensil that spans the top of the vase, loop or tie the snowflake string over it so that it hangs, firmly supported, in the vase (see image below).
- Remove snowflake(s) from vase and gently set aside. If the top of the snowflake isn’t close to the top of the vase, use a piece of masking tape to mark a “fill line” to keep track of how much Borax solution will need to be added to submerge the snowflake.
- Add Borax to the vase/jar(s). Add three heaping tablespoons for every one cup of water required to fill the vase so that the water level is above the top of the snowflake. This is an excellent opportunity to include math with your young scientists:
- Using a measuring cup as a reference, ESTIMATE the number of cups required to fill the vase/jar to the top (or to your fill line).
- MULTIPLY the number of cups by three to determine the number of tablespoons of Borax required for the solution. OR, for younger assistants, ADD up the groups of three tablespoons based on number of cups required.
- MEASURE the appropriate number of tablespoons, carefully scooping and leveling each spoonful.
- COUNT the spoonfuls of Borax as you add to the container.
- Note the number of tablespoons of Borax that have been added to each vase/jar to keep track of your estimate.
- Once water comes to a boil, carefully add to the container(s). Be sure to have the young helper stand back as boiling water is obviously hot, as is the surface of the vase once the hot water is added.
- Was the ESTIMATE correct? If more water is required to reach the fill line, ADD three more tablespoons of Borax per each additional cup of boiling water required to reach the fill line/top of the vase.
- Thoroughly stir the Borax and water solution until all Borax is completely dissolved.
- Gently place snowflake(s) into the solution so that the bottom and sides do not touch the inside surface of vase/jar. Verify that the top of the pipe cleaners are completely covered by the solution. Add more water as required, careful not to dilute the solution too much.
- Place the container on a ledge or table where it can sit undisturbed for 24 hours.
- After crystals have formed, carefully remove the snow crystals, pour out the solution, and then re-suspend the snow crystals in the container to dry for about 30 min or so.


Looking for more snow and snowflake-inspired activities that include more complex math and science topics? The images below display snow-themed activities incorporating elementary through middle school STEAM concepts. Links to posts below!
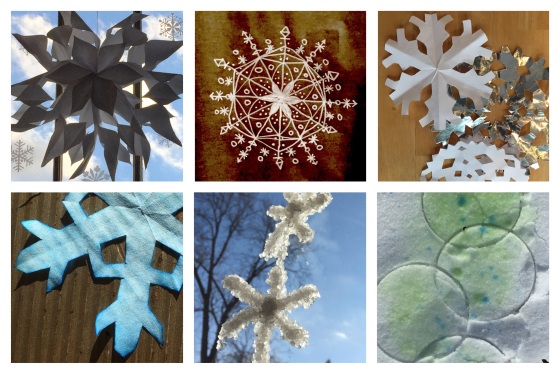
For more winter-themed art activities above that include math, science and engineering concepts go to the following links:
- Do You Want To Build a Snowflake (top left)
- Snow Crystal Geometry (top center, top right + bottom left)
- Growing Snow Crystals (bottom center – this post!)
- A Blank Canvas of Snow (bottom right)
Interested in snowman-themed projects for artists of all ages? The snowman images below are shown in order of complexity starting with toddler/preschool activities and progressing through elementary/middle school STEAM concepts. Links to posts below!
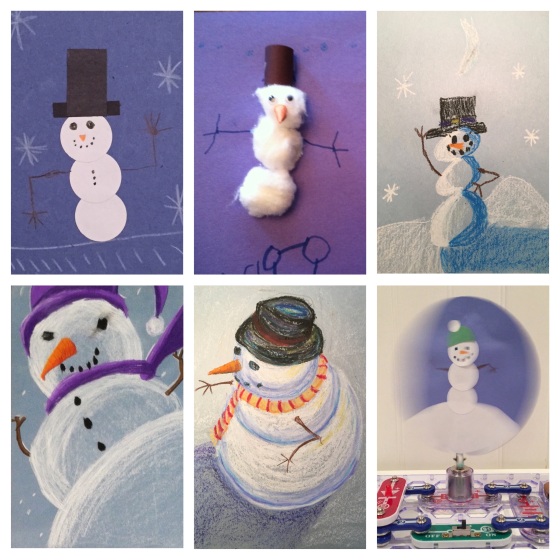
To further explore art, math and science concepts through snowman-inspired activities, go to the following links:
- Stacking Snowman Shapes (top + center left)
- Simple Snowmen (top right)
- Snowmen Perspectives (bottom left + center)
- Thaumatrope Snow Globes (bottom right)

Wow!
Sent from my iPad
>
Pingback: Do You Want to Build a Snowflake? | Design in Play
Pingback: Snow Crystal Geometry | Design in Play
Pingback: A Blank Canvas of Snow | Design in Play
Pingback: Do You Want to Draw a (Perspective) Snowman? | Design in Play
Pingback: Simple Snowmen (with Shading & Highlights!) | Design in Play
Pingback: Thaumatrope Snow Globes | Design in Play
Pingback: Montessori-Inspired & Holiday-Themed Learning Trays | Design in Play