

Earlier this week, my daughter came home very excited to demonstrate the Thanksgiving craft she made at school. The craft session was presented as a way for the third graders to instruct and guide first graders on how to follow a simple set of instructions. Having already assisted a first grader earlier that day, she decided she was ready to demonstrate and document her craft for a blog post. Here it is!
Thankful Turkey
Supplies:
- 1 1/2 paper plates
- white, brown, yellow, orange and red construction paper
- brown crayon
- pencil
- kid-friendly rounded-tip scissors
- 1″ circle punch, such as EK Tools circle punch or Friskars circle lever
- stapler
Instructions:
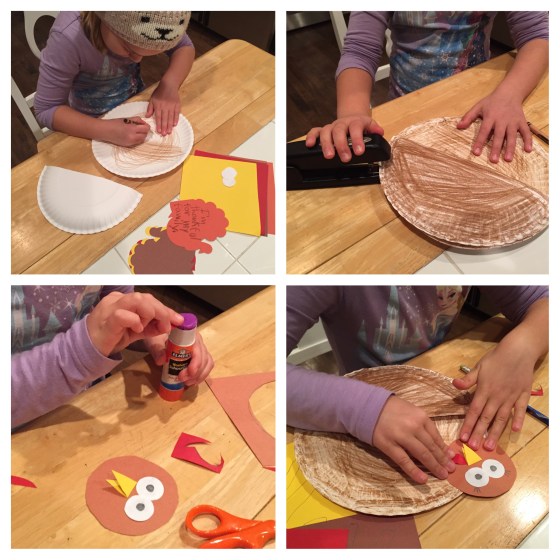
- Color paper plates with brown crayon. Color the front/top of the whole plate. Color the back/bottom of half plate.
- Place half plate upside down on full plate and align edges.
- Staple edges together. (Child may need assistance in keeping seam aligned.)
- Using a large jar lid or other template, trace and cut out a circle on the brown construction paper. Cut out two white “eyes” using a button for a template or a 1″ circle punch.
- Cut beak and waddle from yellow and red construction paper and fold as shown. Glue on brown circle to create the turkey’s face as shown above.
- Glue the circle to the top edge of the whole plate, slightly to one side or at about 10 o’clock position) and press firmly in place.
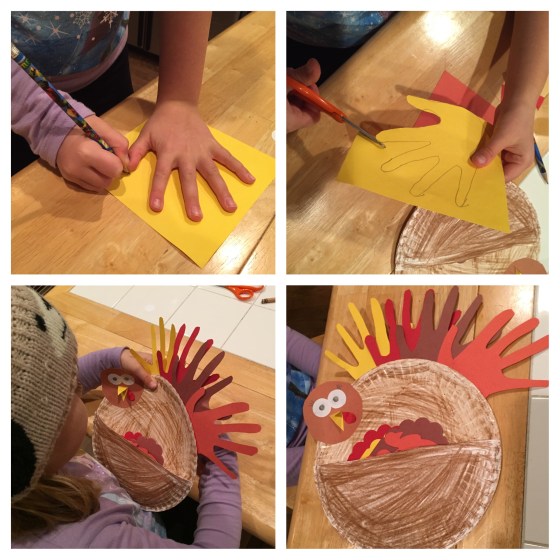
- Trace hand on yellow, red, brown and orange paper and cut out.
- Fan out the handprints and glue to back of top edge of whole paper plate so they create the turkey’s tail feathers.
- Cut out leaf shapes, turkey shapes or other Thanksgiving or Autumn-inspired shapes from remaining construction paper (or keep as simple strips of paper.)
- Invite family and friends to write what they are most thankful for on a piece of paper and place in the Thankful Turkey’s pocket.
Happy Thanksgiving!
